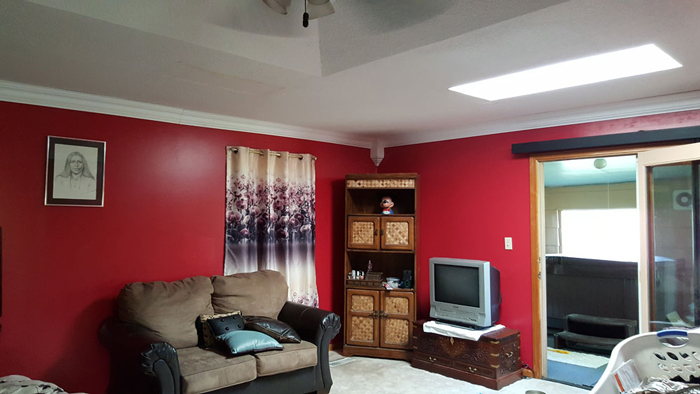
Foam Crown Molding
Written by Milan Jara on 22nd Nov 2018

The next time you have some time to spare, just take a few seconds to examine the area where the walls of your room join with the ceiling. Is there a distinct line or are there decorative elements resembling a fleet of steps? If you’ve found the latter, then there’s a high chance that you’re looking at foam crown molding. Generally, crown molding, also known as injection molding, is used to enhance the appeal of your room.
Traditionally, the crown mold has always been made of wood. However,polyurethane foam has recently emerged as a great alternative. The reason for this is the cost-effectiveness of foam crown moldings. They are also pretty easy to install. This article covers the benefits of crown foam moldings while also providing a guide on how to install them.
Why You Should Go for Foam Crown Moldings

Cheaper
The greatest advantage of a polyurethane foam crown mold is that it is far less expensive to produce than those made of wood. In fact, foam crown molding is the cheapest on the market. Foam is cheaper because its manufacturing process is also very cost-efficient. So, if you have a limited budget but would still like to add a touch of glamour to your home, foam crown moldings are your best bet.
Versatile
Another reason why you should consider foam crown moldings is because of their versatility and a wide range of styles. Essentially, as polyurethane is light, these moldings can be mounted on any surface, be it marble, tile, wood, granite, concrete, steel, or plastic. This attribute makes them the perfect option for decorating everything—from walls to different pieces of furniture.
Easier to Paint
Most foam crown moldings are available on white surfaces, which blend perfectly with the white ceilings in buildings. Unfortunately, plain white surfaces can seem unappealing.
Luckily, foam crown moldings are easy to paint. All one needs to do is look for a water-based latex paint and apply it to the molding. However, if you had a wood crown molding instead, you would have to apply a coat of primer first, then 2 or 3 coats of the actual paint. With a foam crown molding, you can even spray-paint a quick coat and it will look nice.
Available in a Variety of Designs
Another area where foam crown moldings excel is that they come in a wide variety of patterns and designs. These moldings are made in different styles so that they can correspond to the different kinds of ceilings. For instance, a vaulted crown molding will work well in a room equipped with a sloped or angled ceiling. On the other hand, a flat black molding works well with a flat ceiling.
Customizable
If you want a crown molding that you can customize in a certain way, then foam is the best material to choose. For starters, these foam moldings are available in sizes of between 2 and 10 inches. Secondly, you’ll find end-caps, corner pieces,and blocks that you can use to shape into your preferred design. If you don’t want to struggle to cut the moldings to the right size, you should consider single-length pieces of a given size.
Installing Foam Crown Molding
Now that you know the benefits of foam crown molding, how should you go about installing it?
Measure the Area of Installation
Before heading to your local hardware to buy foam crown molding, we recommend measuring the area where you intend to install it. Look for a tape measure and find the perimeter of the room. To calculate this, just add the lengths and widths. Next, add an extra 5% to the figure you get, to account for possible waste.
Determine Angles
After determining the perimeter of the room, the next step is to find the angles at which you’ll be cutting the moldings. Using an angle finder, find the total angle and divide it by two. By doing so, you can establish exactly how much of an angle you will need to cut on every piece.
Make the Cuts
To make cuts on the foam crown moldings, use a miter saw. When making these cuts, be sure to hold the molding firmly in the saw so that you can make quick, clear cuts. This way, you’ll be able to cut through the molding nicely without leaving any uneven edges.
Smooth the Edges
The next stage entails smoothening out rough edges on the crown molding. Failure to smoothen these edges might cause them not to fit together and the installation will look like a cheaply-done job.
Install the Foam Molding
For the installation, you will need a caulk gun to attach the foam adhesive. When applying this adhesive, do so in a zigzag pattern. Once you are through with this step, press the molding firmly against the surface where you want it installed; this could be a wall or ceiling. Be careful not to leave any gaps between the wall or ceiling and the molding. Press the molding in place for half a minute or so to allow the adhesive ample time to dry.
The next step entails fixing the seams at the points where the foam crown moldings meet. Place the molding to look like one continuous piece of surface. If there are a couple of gaps, you can use painter’s putty to fill them.
Paint the Molding
One of the reasons that make foam crown moldings so popular is because they’re customizable. For one, you can paint the molding any color you want. So, once the molding is securely in place, you can paint it. It’s advisable to start with a coat of primer before applying the paint. Allow the paint enough time to dry and you’re good to go.
The Bottom Line
Foam crown molding will look great whether installed on a wall or ceiling. You will often see this type of molding on cathedral ceilings. However, these moldings look just as great when installed in homes, offices, and other areas. Foam crown moldings offer a ton of benefits including reasonable pricing, easy installation, customizability,and versatility. Also, these moldings are available in a range of designs so it will be easy to find one perfect for your room.


