How to Install Faux Tin Ceiling Tiles with Ease
Written by Milan Jara on 9th Aug 2018

So, you’re ready to take your ceiling from drab to fab. Are you tired of the popcorn ceiling effect or simply ready to shake up the flat white sheetrock design?
Tin ceiling tiles could be your answer to creating a ceiling that really pops with character!
Like with the metal backsplash in the kitchen, you’ve seen these metal ceiling tiles and tin variants in some of the most exquisite homes across the world. Now, you can have the same look for less than the cost of the real tin tiles.
Enter faux tin ceiling tiles!
If you aren’t familiar with faux tin decorative ceiling tiles or ceiling panels, you’re going to be amazed at the versatility and realistic appearance these faux tin tiles give off!
What are faux tin ceiling tiles?

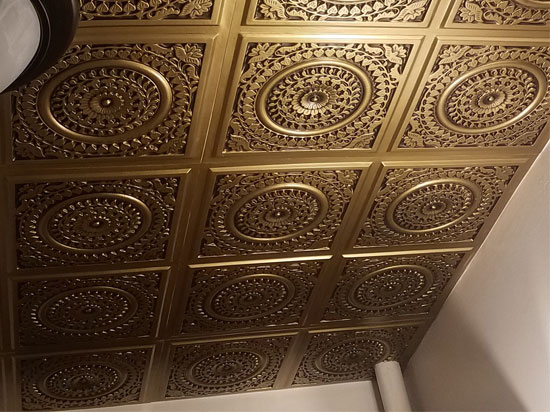
Instead of creating ceiling tiles out of actual tin metal, manufacturers have found a way to create the same look but with PVC paneling. These panels are strong and look just like the real thing.
With PVC paneling created to look like tin ceiling tiles, homeowners can achieve the same look many of the historic homes around the world have done. These faux tin ceiling tiles are easy to install and long-lasting.
Why choose faux tin ceiling tiles over the real thing?

Many homeowners love the idea of a tin ceiling tile look in their home but the cost of installing real tin ceiling tiles can be quite expensive. Therefore, those who wish to replicate this look on a smaller budget opt for the faux ceiling tiles to give them the same effect.
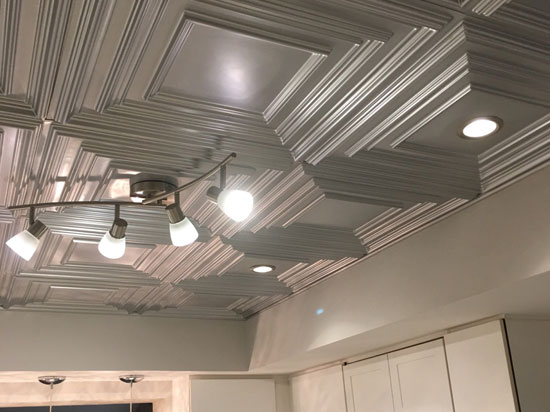
The only difference between the actual tin ceiling tiles and the faux ceiling tiles is the actual material. And, when placed on the ceiling of your home, there is no way to tell whether or not you have real or faux tin ceiling tiles.
Install your faux ceiling tiles today.

If you have some extra time on your hands and are looking for a way to spruce up your home in a few easy steps, installing faux ceiling tiles is the perfect solution.
You can check out some faux tin ceiling tile options here.
Here show to easily install faux ceiling tiles in your home with little-to-no cost and/or effort:
Required Tools
- Ruler
- Caulking Gun
- Adhesive
- Screwdriver
- Tape Measure
- Hammer
- Razor Cutter
- Ladder
- Flat Knife
- Chalk Line
- Faux Tin Ceiling Tiles
1. Measure the Room
Before you start doing any type of installation, the very first thing you should do is measure the room you will be installing the faux tin ceiling tiles.
When you have the measurement down, buy a couple of extra faux tin tile pieces just incase the measurement is off or cutting the tiles goes awry in the process of installing these decorative ceiling tiles.
2. Prep the Ceiling
Anytime you put something on another piece of material, it is important to prep the surface first. Because you will be applying an adhesive to the sheetrock, there are a couple of things you must do to make sure the adhesive will stick properly.
Before beginning any work, cut off all of the electricity in the room where you will be working. This will keep you from hitting anything electrical while you’re working.
Take down all fans, lights, vent covers, etc. from the ceiling surface. You want a smooth, clean slate.
Clean the ceiling with a vacuum cleaner hose (preferably one with a brush extension tool). Then, sweep up any remaining dirt from the floor that may have escaped the ceiling.
If you have a popcorn ceiling surface, remove the bumpy surface using an approved removal method.
3. Center the Room
Mark the center of the room on the ceiling by measuring all four sides and then dividing by two. From the center, take your chalk line and extend it all the way to the opposite wall on all 4 sides. Snap the chalk line once you have reached the other side. This will give you boxes to work off of once you start installing the faux tin ceiling tiles.
4. Installation Time
Now is the time you’ve been waiting for: installation! Start from the center of the room which you already marked off. Apply the adhesive in small dots all over the backside of the faux tin ceiling tile and spread it out with a flat knife. Be careful not to place too much adhesive on the outside edges the ceiling tile. Read all manufacturer directions before starting the installation process.
5. Cutting Corners
This type of cutting corners does not mean getting by with doing ‘cheating’ type of work. When you start reaching the fixture holes where the fan, vent, and lights are placed, you will want to cut the tile accordingly to fit properly. It is easy to cut on the outside of the tile versus cutting into the tile, unless the hole is small in size.
6. Keep the Edges in Mind
You want to start at the center of the room that you marked off and move outwards towards the wall. Once you get closer to the wall and realize you are about to hit the edge, it is time to start cutting the edges. Using the attached tile, measure from the outside edge of the tile to the edge of the wall with a ruler or tape measure. Be sure to use a sharp knife that will allow you to cut the tile to fix the remaining space. Then, place the tile on the wall according to the directions and repeat this process around the entire room.
7. The Final Step: Caulking
Once all the faux tin ceiling tiles are placed on the ceiling, go back and caulk the middle seams where the tiles meet. Give it time to dry and then place the fixtures back where they belong!
Remember that this is probably best suited for more than one purpose. Working on installing faux tin ceiling tiles can be fun but it can also be difficult to do alone! Make sure to use all safety precautions while installing ceiling tiles such as safety gloves for cutting and protective eyewear during cutting and installation.


