How to Install Tin Tile Backsplash
Written by Milan Jara on 3rd Aug 2018

In the home or office or any space where people spend a significant amount of time, surroundings are important. If you’re regularly operating within and looking at the same space, it should be an enjoyable experience. In this article, you learn how to install the tin tile backsplash.
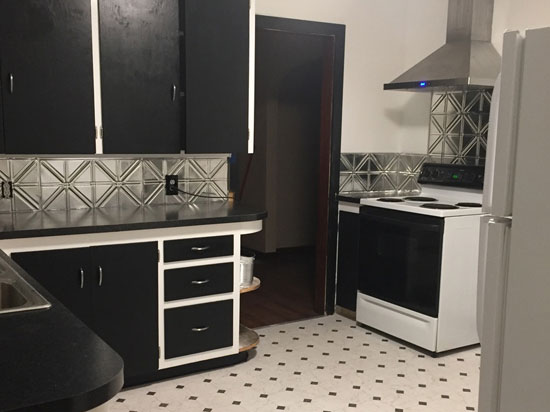
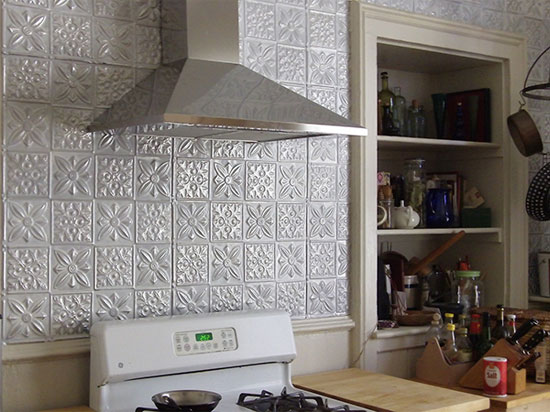
In the home, rooms, where we gather with friends or family, tend to get the most use. Bedrooms, too, bear witness to much of our lives, even if we’re usually asleep there. But kitchens and bathrooms get a great deal of frequent use as well. A tin tile backsplash is a wonderful way to both accentuate an otherwise plain wall.
They also have the added benefit of protecting the wall from moisture and stains. Besides being fairly inexpensive, they're more straightforward and faster to install than ceramic tiles. Here is all the know-how you need to do the job yourself and do it like an expert.
Choosing the Right Tile

Before we jump into the step-by-step stuff, it's important to consider what kind of tile you want. Fortunately, there are a wealth of designs and motifs to choose from, whether classic or modern. And, costs are similar for 2 foot by 2-foot tin tile backsplash, regardless of design. Modern manufacturing techniques mean your tin tile backsplash vision can be achieved for virtually any color. And tin tile backsplash can be custom painted.
Whatever tin tile backsplash you choose, they are installed one of two ways: nails or glue. This guide outlines the necessary steps on how to install a tin tile backsplash, but the process is similar for all metal backsplash tiles.
Getting Started: Tools and Materials for Installation
Before you begin installing your tin tile backsplash, you’ll need to gather all the tools and materials. Here’s a comprehensive list of everything you’ll need:
Leather Work Gloves – Tin tiles have really sharp edges, even before you make your own cuts. Be sure to wear leather work gloves at all times when handling the tiles.
Safety Goggles – These are most important when cutting or drilling the tin tiles. Small pieces of metal under pressure can quickly become projectiles.
Drop Cloth – These at 1 to 3 pounds apiece, tin tiles can be cumbersome. A drop cloth can help protect your counters.
All-Purpose Cleaner – A simple spray-bottle type cleaner will do. A cleaner surface will take the construction adhesive more securely
Paper Towels – A better quality towel that won’t leave lint or debris is preferable.
Measuring Tape – You’ll first use this for measuring the area you’ll be covering with your tin tile backsplash. Then, you’ll need it for measuring any tiles you’ll be cutting.
Marker – A pencil will probably do fine for marking the wall area for your tin tile backsplash. But you’ll need a marker, preferably with a fine tip, for making the cut lines on your tile.
Tin Tiles – Tin Tiles are generally sold in dimensions of 2ft by 2ft (4 Sq.ft.) or 2ft by 4ft (8 Sq. ft). But it's rare that the measurements will come out to exactly elven feet. Be prepared to cut some tiles. And it's always a good idea to buy some extra tiles in case of errors.
Level – Used for both ensure the tin tile backsplash is level, and as a straight edge for marking guidelines.
Tin Snips or Guillotine Cutter – Tin tiles are thin enough to be adaptable and easy to work with. However, they're also thick enough to require more than scissors for cutting. A good pair of tin snips will work fine and are necessary for cutting holes for switches and outlets.
However, if you have the budget, guillotine cutters save time and add precision to long cuts. Guillotine cutters are the hinged blade cutters used for paper like you would see in a print shop. But you'll need an industrial strength version.
Drill – This tool will be necessary if you need to make cutouts for electrical switches and outlets. Select a drill bit that will produce a hole large enough to permit the tin snips.
Construction Adhesive – Tin tiles are heavy, so a strong adhesive is crucial.
Clear Silicone Caulk – Your tin tile backsplash is designed to resist water. But water running down its face can still be a danger in the crack between backsplash and sink. This will help seal the lower edge against leaks.
How to Install Tin Tile Backsplash
Now that you've gathered the items you'll need for installing your tin tile backsplash it's time to jump into the real work:
Prepping the Space:
- Make sure your work area is clear of debris and inessential materials. And give yourself as much room to work as possible. Tin tiles can be sharp, and accidents can happen quite easily if care isn't taken. And those edges can damage countertops and floors too. Don't forget the dropcloth.
- Remove any switch or outlet covers, or anything else covering the walls. If possible, turn off the breakers to that area for safety’s sake.
- Using the all-purpose cleaner and paper towels, thoroughly clean the area to be covered by the tin tile backsplash.
Measuring:
- If tiling behind the stove area (or any gap in the counter), use the level to draw a straight guideline between the countertops.
- Remeasure the area you’ll be covering with your tin tile backsplash. Be sure to calculate for wall switches, outlets, and other wall features you’ll want to leave exposed.
- On a flat surface (probably the floor), lay out all the tiles you’ll need, face down. Using the level as a straightedge, mark the same size area you’ll be covering on the backs of the tiles.
- Make marks for any switches, outlets, etc.
- Whenever possible, keep the exposed perimeter of the tin tile backsplash reserved for the factory edges. These edges tend to be less sharp, so they’ll be of less danger in the future.
Cutting and Drilling:
- Cut the tiles using the tin snips or guillotine cutter. Again, use the leather gloves. This is the part where injuries are most likely to occur.
- Drill holes into the center of the areas marked for switches, outlets, etc. Then, using the tin snips, cut to the edge of the markings and cut out these areas.
Applying Adhesive:
- Add construction adhesive to the raised areas on the rear of a tile. Then, place that tile to the area on the wall you've marked out for the tin tile backsplash. Press firmly, and rub all the recessed areas on the front of the tile.
- Repeat for each tile, overlapping the edges. There are usually embossed grooves to aid in this. Be sure to add additional pressure at these seams.
- The pressure of securing the tiles will squeeze out excess adhesive along the edges. Be sure to wipe this away as quickly as possible.
Final Steps:
- Using the clear silicone caulk, seal the edge between the tile and countertop. If concerned about sharp edges at the exterior of the tin tile backsplash, you can caulk here too. However, this can affect the look of the backsplash. So, use discretion and don’t overdo it.
Final Thoughts
With very little investment of time or materials, you can add a tin tile backsplash to your kitchen or bath. In turn, this can add a degree of character and visual enjoyment to the room for years to come. As with all DIY projects, do your research to see what options are currently available on the market.
We hope you enjoyed this article, on how to install a tin tile backsplash. Share it with your friends on social media and be sure to check out all the articles and products available at Decorative Ceiling Tiles. And, be sure to subscribe to our newsletter for the most recent posts and updates. Thanks for reading!


