Wainscot Bathroom Designs & How to Install
Written by Milan Jara on 5th Apr 2022

Wainscoting is a great way to create visual appeal in a bathroom. However, it is not without risk, as bathrooms contain plenty of moisture. The wrong type of wainscoting can warp, rot, or allow bacteria to multiply. The good news is there are ways to do a wainscot bathroom properly, but it does require some knowledge.
Type of Wood Best Suited for Bathrooms
Two ways exist that minimize problems when wainscoting a bathroom. One solution is to use rot-resistant and mildew-resistant cedarwood. The other option involves sealing the wood using a clear finish or paint.
A third option exists: installing MDF (moisture-resistant medium density fiberboard), hardboard, or PVC beadboard wainscoting panels. This option provides a great alternative, providing you are not set on real wood.
Installing wainscoting in a bathroom is straightforward, as long as you have the proper tools available.
Bathroom Wainscoting Ideas
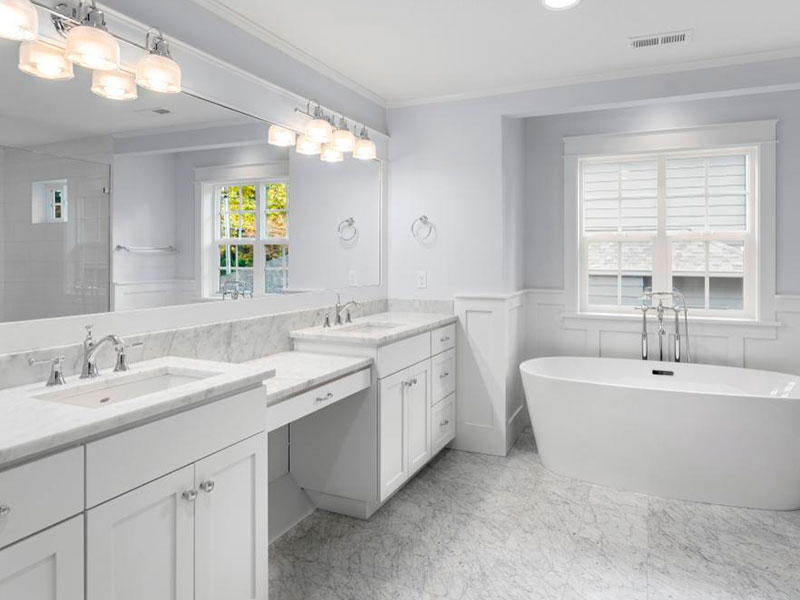
Wainscoting involves wall panels covering the lower portion of your wall. It tends to be the lower third, but height can be optional depending on the space. Wainscoting includes adding a trim piece along its upper edge or chair rail molding. This upper edge doesn’t have to be gauged according to chair height.
The name itself originated from the Shakers who used these rails to hang chairs that weren’t in use. Designers tend to install a chair rail on a bathroom wall at the same height as the vanity.
Plywood Beadboard
The most common type of wood for bathrooms is plywood beadboard paneling. Most times, it has tongue-and-groove or overlapping edges to provide a smooth, undetectable seam. Some do not have edges that interlock. Therefore, you must cover each seam with batten. For aesthetic purposes, you may install battens anyway despite installing interlocking panels.
Beadboard wainscoting consists of hardwood and MDF. They are milled to appear like actual wood. If you plan to paint it, you can save money by making this selection.
Tongue-and-Groove Planks
These are redwood or solid cedar. The benefit of cedar is that it is mold- and mildew-resistant. Finishing this material is optional. You can also use a clear sealer to deepen the natural wood tone adding visual appeal. Doing this makes the wood washable and improves its moisture resistance.
Leaving the wall paneling unfinished is best for powder rooms that do not contain a bathroom, shower, and where cleaning is minimal.
An Overview

Installing wainscoting in a bathroom involves basic carpentry skills. It is easier if you remove the toilet. Sometimes, you will need to remove the sink plumbing as well. For pedestal or wall-mounted sinks, you need to remove the plumbing shutoff valve to allow you to fit panels tightly around visible water pipes.
You may need to do some basic electrical work. When wall paneling is notched around receptacle boxes, you may need to extend your boxes outward so they are flush with the new wall. Doing so is a code requirement designed to prevent fire hazards. You can purchase electrical box extenders to make the job simpler.
You can install panels using basic carpentry tools. These include measuring tools, saws, and a brad nailer. The bottom edge of your panels or the planks can rest on top of your baseboards. If this is the look you want, install the baseboards first. Doing so also allows you to use it as a reference to measure and cut panels.
You can also install wainscoting, then add the baseboards over your paneling. This is advisable when the baseboard’s top edge is not thicker than your paneling.
After installing your panel wainscoting, plank, chair rail, or other decorative trim piece and before replacing plumbing fixtures, caulk your chair rail, the edges of installed battens, and the baseboards.
Finish Options
You can paint wood wainscoting. If you chose to paint it, use any latex-based interior enamel. Seal the planks and paneling with high-solid primer to allow you to seal knots while preventing them from bleeding through your paint. It guarantees a smooth, flawless finish and good paint adhesion.
For a clear finish, use spar varnish. It will provide good moisture protection for all the clear finishes on the market. While. It may alter the color a bit, if it becomes a concern, use polyurethane. A top-rated product to use is Deft Interior/exterior water-based polyurethane. It is easy to clean with soap/water and will not yellow.
Steps to Installing Bathroom Wainscoting
- Remove Objects from Your Bathroom. You should remove the toilet, vanity, and sink. Remove covers off electrical boxes where you will be installing the paneling. Remove any additional items from walls that may hinder your progress.
- Install Baseboards if Needed. If your bathroom doesn’t contain baseboards, then install them. To avoid cutting paneling at an angle, use a spirit level for leveling. Fill the gaps between the floor and the baseboards using caulk after installation.
- Mark Your Position from the Top of Your Paneling. Using a tape measure/pencil, mark the top of your paneling on one wall. Draw level lines around your room that are at this height. Fortunately, the chair rail will hide the line. Therefore, don’t forget to add the rail’s width when determining the final height.
- Prepare Your Wall. Do any drywall repairs before installation. If the wall is textured, sand or scrape it off to ensure the paneling adheres properly. Use rubber gloves and a sponge to wash walls between your baseboard and panel height line using a deglossing solution. The deglossing solution consists of half a cup trisodium phosphate for each gallon of water. Please ensure you follow your manufacturer’s directions, as this is a rough guide.
- Mark Your Stud Positions. Locate wall studs with a stud finder. Not the position of each using light marks. These should indicate both sides of the stud above the panel height line. When you drive nails in to hold your panels while setting the adhesive, they need to go in a line on the marked stud.
- Install Your Panels. You can then dry-fit your panels on a section of a wall or one wall. Cut your panels to fit when required, including notches for electrical boxes, obstructions, and pipes using a jigsaw. Construction adhesive should be spread on the rear of each panel while pressing it to the wall. Then, interlock it with your previous panel. Using your brad nailer, drive the brads into your studs for a hold.
- Install Trim. Depending on your style, the chair rail can fit on your panel’s edge. You may have to install furring strips while attaching the trim to the strip. Next, nail your furring strip/trim to your studs using finishing nails or brads. If you are installing battens, space them in front of studs if possible. It will allow you to securely nail them. If you can’t, use construction adhesive to glue it to the paneling.
- Paint Your Paneling/Use a Clear Finish. Lightly sand the paneling before doing the first coat/finish. Apply primer first, then do two coats of paint. If doing a clear finish, use two coats based on directions.
- Caulk Your Trim. Using a silicone caulk accompanied by a matching trim color or clear silicone, apply it to both edges of your chair rail, baseboards, and batten. Caulk along the existing trim the panels come against and in bathroom corners where paneling is untrimmed.
You can install wainscoting in the bathroom as a full border or as an accent wall in a bathroom. Part of the fun is playing with the design. Ensure that the paneling you select will resist moisture, bacteria, and warping, as this is crucial when installing it in a bathroom. The rest of the decision remains up to your personal preference.


